Customize Verify API
Occasionally, there arises the need to tailor task qualification validation, ensuring that users have the necessary permissions to access or submit specific tasks. This customization can be implemented to verify user entitlements for task-related actions.
Step 1 Expose an endpoint
Expose an API within your system, for example: https//your-api.com/validate-task-qualification
This API should be capable of accepting the following parameters through either GET or POST methods:
telegram_user_id: User's Telegram IDwallet_address: User's wallet addressemail: User's email address
Ensure that your API can return text-based data, for example:
- Validation success:
true - Validation failure:
false
You can refer to the following API examples:
- Validation success: https://growthly.footprint.network/api/v1/common/verify/example/success
- Validation failure: https://growthly.footprint.network/api/v1/common/verify/example/fail
Step 2 Configure custom validation tasks
-
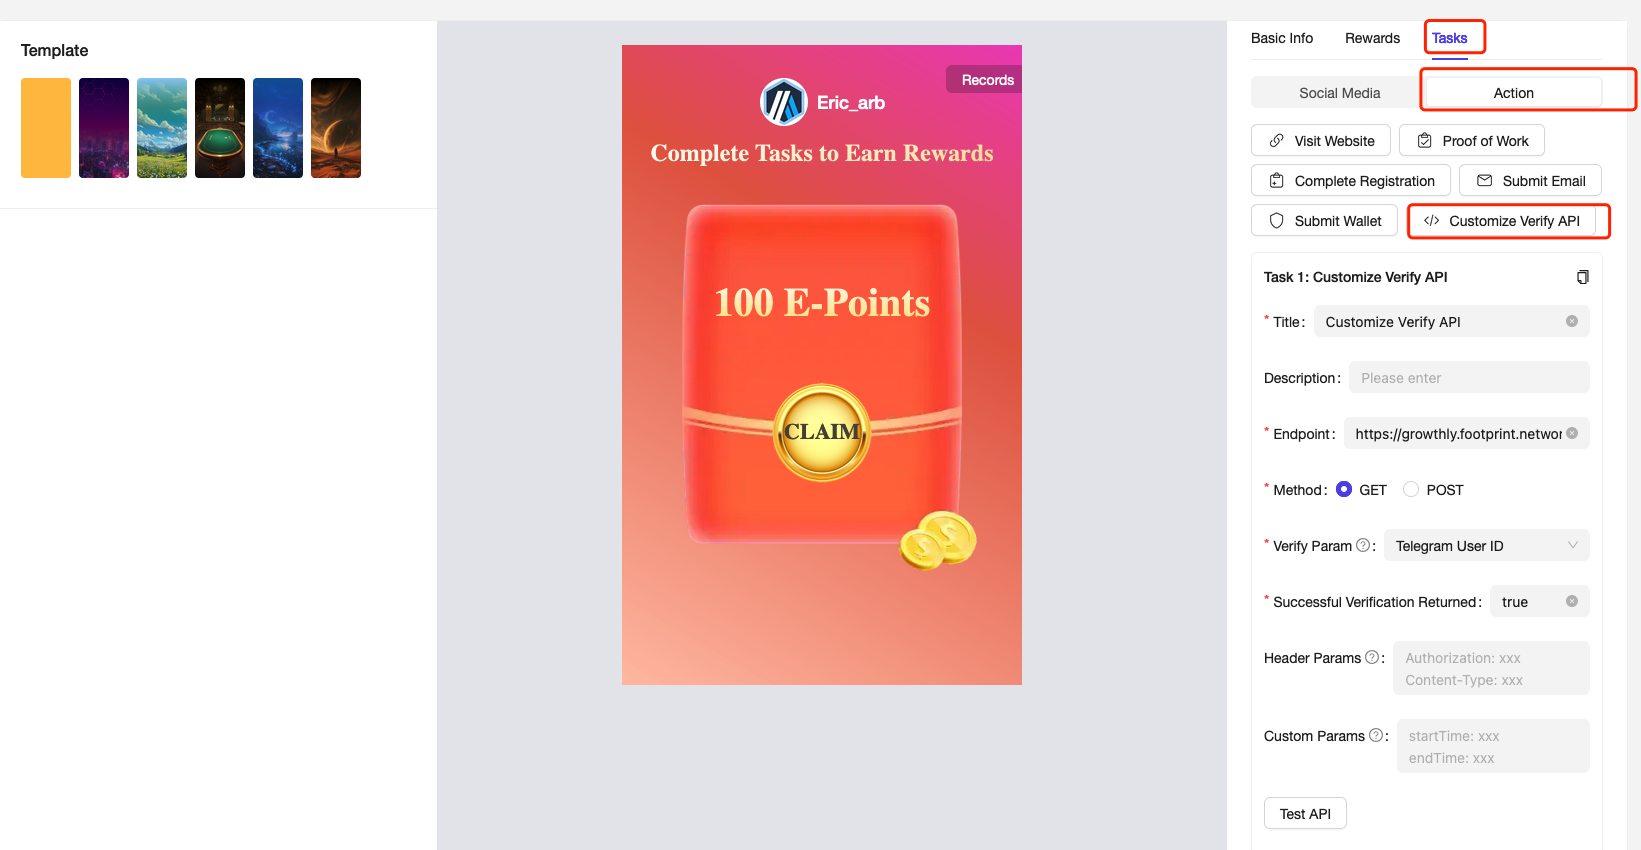
Log in to the Growthly Admin System, navigate to Quest - Create Quest ,and select a specific quest to enter quest configuration.

-
Navigate to Tasks - Action, and choose [Customize Verify API] to configuring the custom validation task.

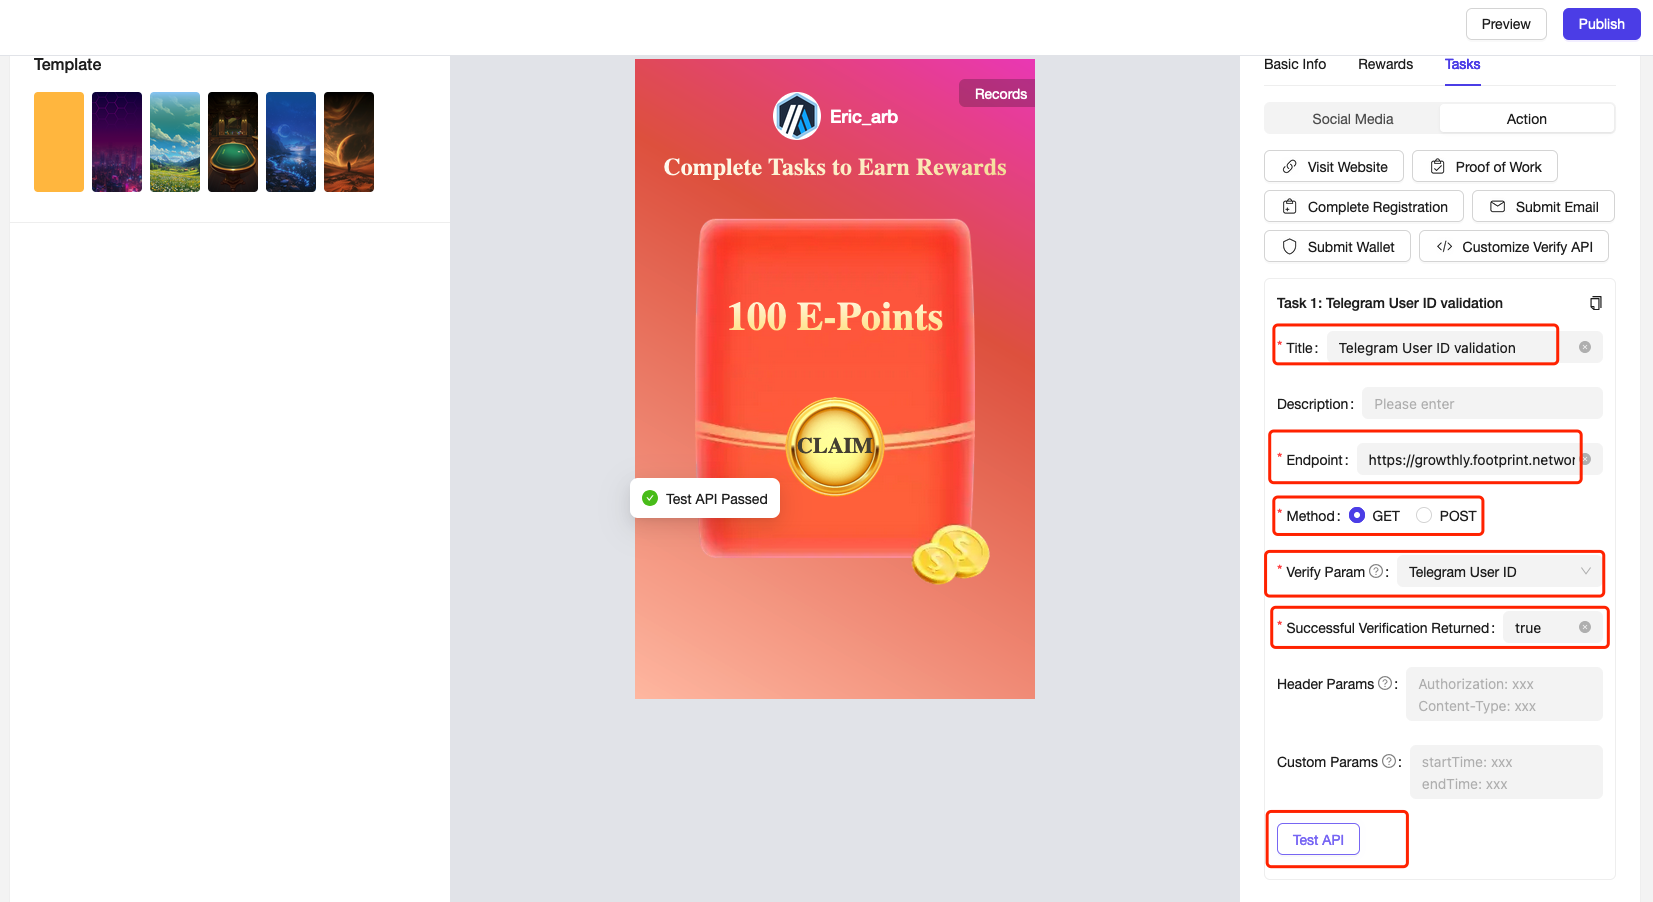
- Complete the configuration
- Enter the task title, such as :
Telegram User ID validation - Enter the endpoint that is exposed within your system.
- Select the endpoint's request method (GET or POST), such as : GET
- Select the Verify Param, such as : Telegram User ID
- Support the verification of parameters.
- Telegram User ID
- Wallet Address
- Support the verification of parameters.
- Select the Successful Verification Returned(true of false), such as : true. This parameter determines the conditions for updating the task status in the system.
- Click [Test API] button to validate the accessibility of the API, and ensure it returns 'Test API Passed'.
- Finally ,[Publish] this quest.
- Enter the task title, such as :

Updated 3 months ago
